Showing posts with label static. Show all posts

Use Github as a CDN to store and serve static content (JavaScript, CSS, Images) with rawgit

In this article I will be explaining how to use Github's "raw" feature coupled with rawgit to store and serve static content

Please note I assume you have some basic git knowledge
1.- Creating a Github account

Ok so first things first, in order to do this you need a Github account; so if you don't have one head up to the GitHub website and create one ; go ahead I'll wait :)

2.- Creating a Github repository

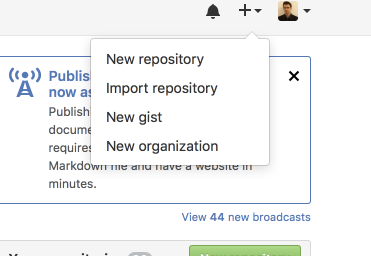
Login to your Git account and create a new repository :
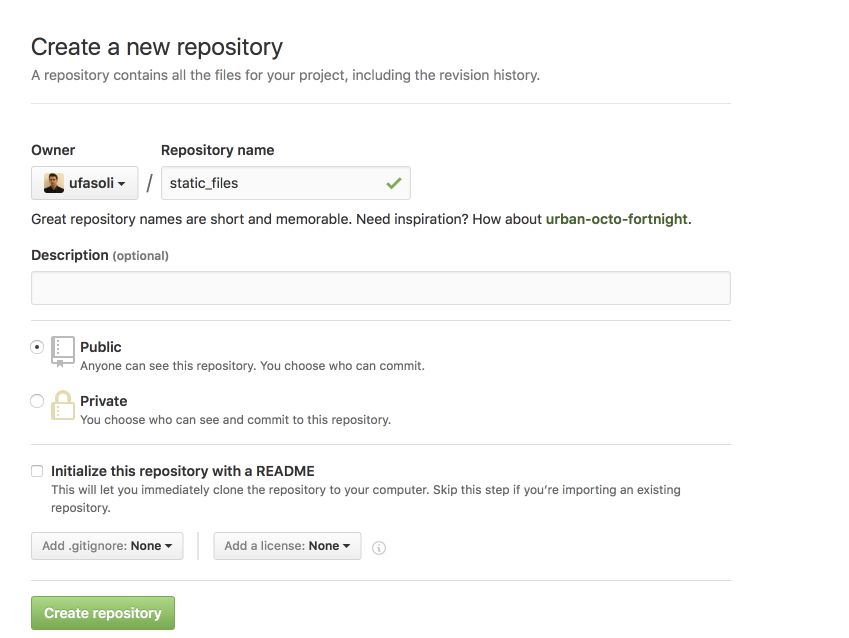
Provide a name for your repo (for example static_files) :
3.- Build repository structure

We will now create a folder structure for our repository in order for us to organise the files, for example :

  • css
  • js
  • img

So now go ahead and clone your git repository from either the command line or with your favorite tool

git clone https://github.com/xxxx/static_files.git

Once the repository is cloned; go ahead and create the 3 folders mentioned above

cd static_files
mkdir css
mkdir js
mkdir img

Ok so Git does not allow you to commit empty folders, so now in order to commit our folder structure we have to add at least 1 file to each one of the folders; at this point either :

  • copy your existing files to their respective folder based on their type (images, javascript, etc.)
  • create your content files in the respective folders (i.e. custom javascript, css etc.)
  • create placeholder files in each of the folders (for example: touch js/.gitkeep ; touch css/.gitkeep; touch img/.gitkeep)
git add *
git commit -a -m "initial commit"
git push
4.- Obtain files URLs and serve them

Go back to your GitHub account and open the repository then navigate to a file you want to serve, then click on the "raw" button:
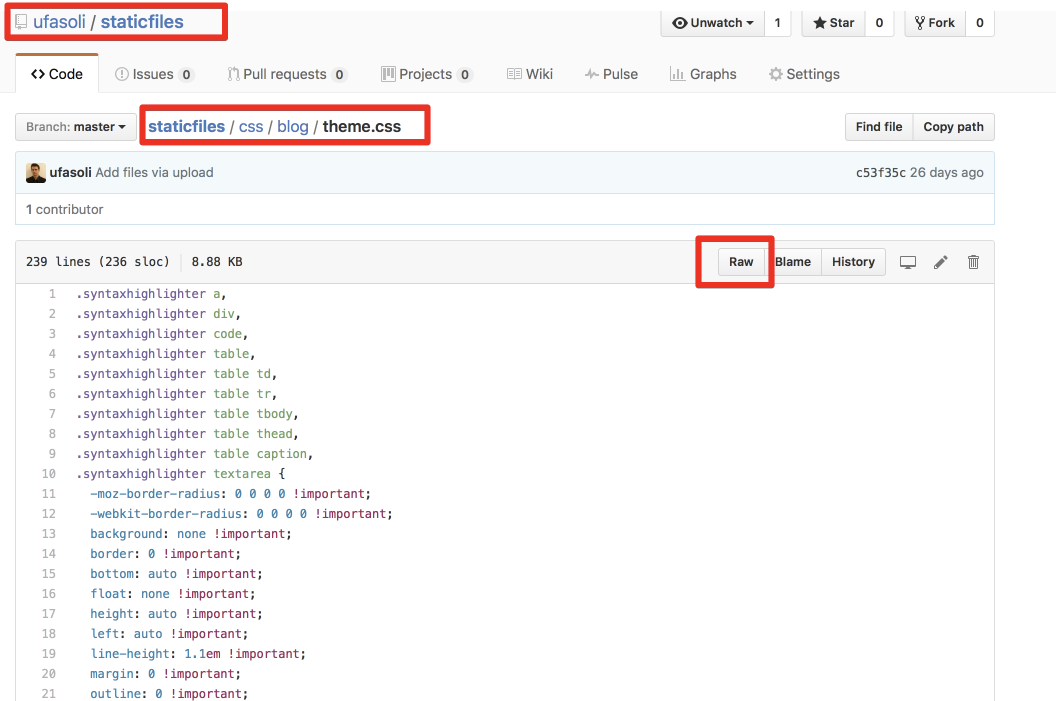
After clicking on the raw button you should be redirected to a "raw" page

Copy the url in the browser (it should start with raw.githubusercontent.com) and head up to http://rawgit.com paste the url in the main input
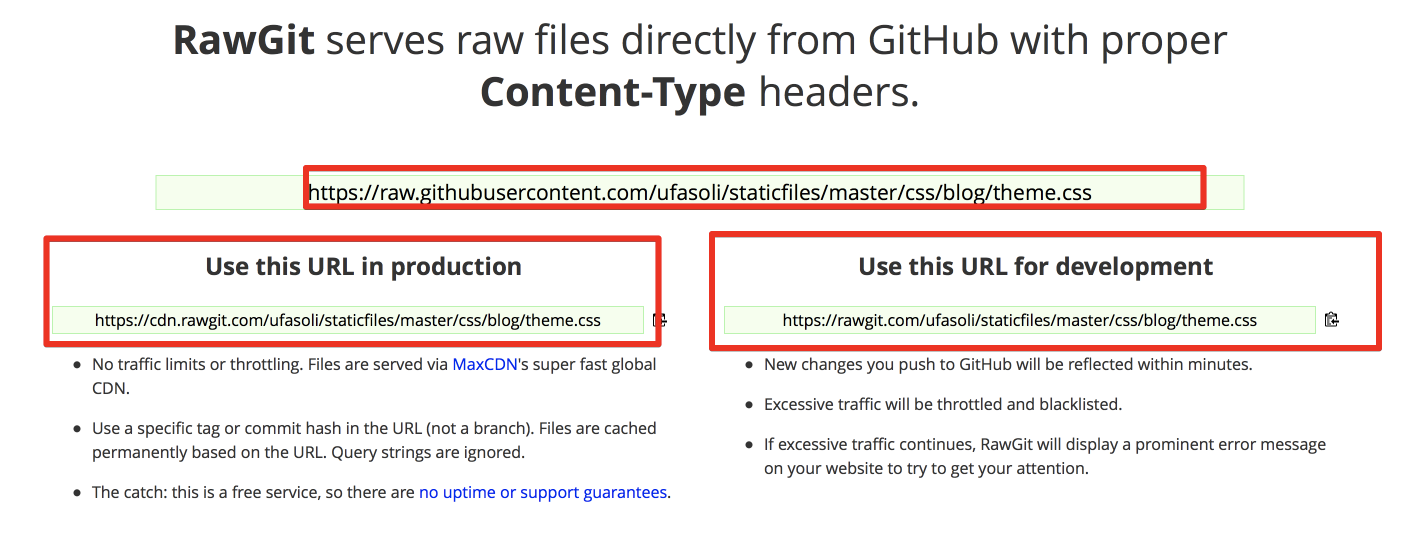
Below you get 2 CDN urls that you can use either for production or development

5.- Include the files in your website

Repeat step 4 with all the files you want to serve and include them in your website


Finally please also note that as stated in their website that rawgit : is a free service, so there are no uptime or support guarantees.

OSX Wi-fi and Ethernet network simultaneously connected and static routing

So recently I had a situation where I had my Ethernet and Wifi connected to 2 different networks in my MAC OS X, and I had a very specific use case for this

I needed to use the Ethernet connection to access 1 specific host (an internal web service), the connection through the ethernet cable allowed this but did not allow internet access, the Wifi connection allowed internet access but will not allow access to the internal web service, so basically what I needed was :

  • Have both connections active
  • Access the internal web service through the Ethernet connection
  • Access all the other hosts through the Wi-fi connection

Just connecting both interfaces does not work I was either getting access to the internet or either access to the internal WebService; if you check this article over at apple OS X network interfaces priority you can see that you can change the priority used by the system to route the requests; so if you change the priority of the Wi-fi to be on top you get internet access but not access to the internal network, and vice-versa

Sure you can make it work this way but it's really painful to have to manually change the interfaces priority to accommodate what you are trying to do at that moment

The solution that I found is to add a static route to that host; this can be easily done in a few steps (you will need for this the IP of the internal host you are trying to access)

  1. Give your Wi-fi interface the highest priority (put it on top), for this you can refer to the apple link cited above
  2. Identify the interface names, for that execute the following command on the terminal netstat -nr (in my case en0 is the ethernet interface whereas the Wi-fi is the en1)
Add a static route for the specific host (10.120.136.57) telling it to use the gateway of the Ethernet interface by running the following command in the terminal
sudo route add -host 10.120.136.57 10.247.131.1

And that should be it, please note that restarting the PC will probably remove the static route from the routing table so you will have to re-add it

OSX show used ports or listening applications with their PID

On OSX you can display applications listening on a given port using the lsof the commands described below will show listening application...